Joe had some problems with his front CV boots and wanted to install a set of manual hubs to keep the front end from turning when he was on the road. He got a complete kit from Off-Road Solutions and went to work installing it.
Since his CV Boots were also bad, he ordered a set of the Downey high clearance boots.
The entire installation took us 7 hours, but that was with a good 45 minute lunch break, going to the shop to have the press work done and to Toyota to have the hub nut torqued. If you had the hub nut socket and did the press work yourself, you should be able to get it done in 5 hours or less.
For the ORS Manual Hub Kit Instructions click HERE.
For the Downey CV Boot Kit Instructions click HERE.
If you have any questions, you can e-mail Joe directly.
For all of the install pictures click HERE.
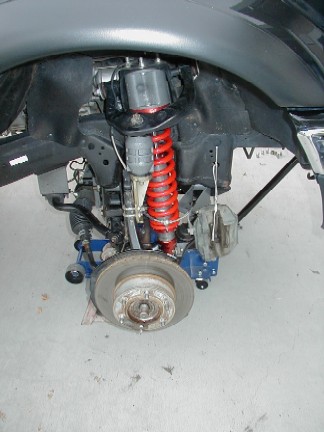
The first step is to remove the front CV halfshafts and spindles.
You need to remove the brake calipers and hang them out of the way.
Take anything attached to the spindle loose, in this case, it was a zip tie that held the brake line and ABS sensor, remove the ABS sensor from the spindle, take the brake line loose from the spindle. You can then remove the four bolts that attach the lower ball joint to the spindle, and then the nut that holds the upper ball joint to the upper control arm.

I have always had a problem getting the upper ball joint out of the upper control arm without any harm or special tools. I think I have now found a good way!
I removed the nut, then put it on upside down again until the top of the upper ball joint stud was level with the nut so you are applying pressure to both the stud end and the nut at the same time. Then using a small scrap of flat metal to protect the nut and stud from damage, you can tap on it. After just a few taps of the hammer, it came out with no damage.


With the upper ball joint loose, the spindle comes off the truck. It is off to Auto Parts Unlimited to have the press work done.


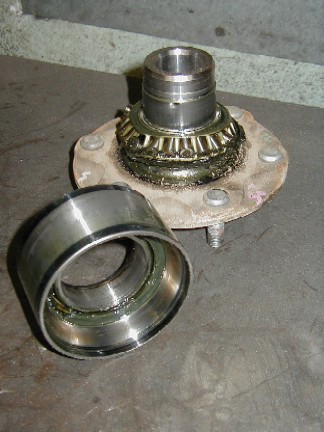


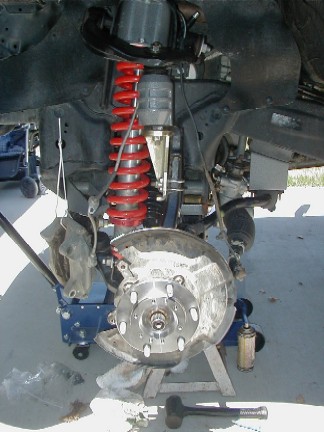
After pressing in the new wheel bearings, the large snap ring and seal have to be installed before installing the hub!
Once the new bearing is in, its time to press the new hub into the spindle.
Auto Parts Unlimited always has us in and out faster than they say. He said that it would take about and hour and a half, but we were out of there in about 40 minutes.


They use the leg on the lift to keep the hub from turning. They said that if you try to put it in a vice, it just moves the entire work bench.


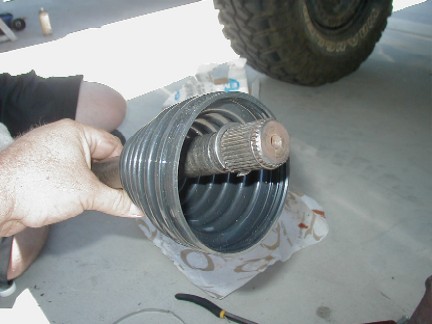
The first step was to cut the old bands that hold the boots on.
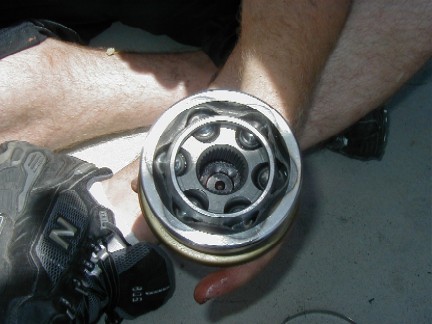
The inner joint slips apart when you remove the boot, then you have to remove the joint from the shaft. Be careful so as to not knock the rollers off! We used a pliers to open the C clip up and let it slip down the shaft.


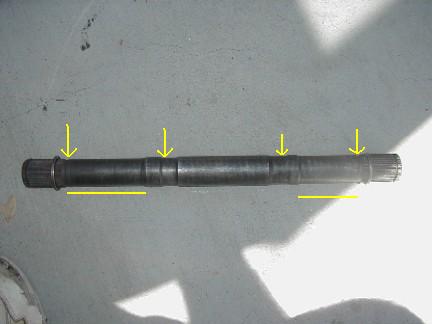
Also note that on the new shafts, the grooves are not the same on both ends. In this picture, you can see that the end towards the left of the picture has more space between the grooves than on the right side. There are similar grooves on the stock shafts, so make sure it all goes back together the same way it came apart!
The arrows point at the grooves. The lines underneath show the difference in length.


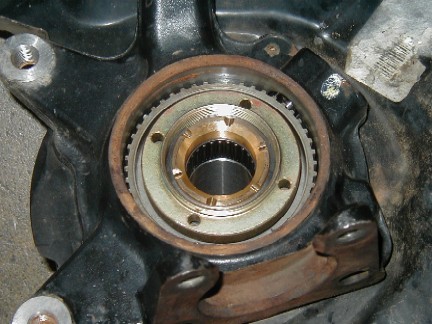
Install the supplied dust seals onto the back side of the spindles.
Here it is all together.

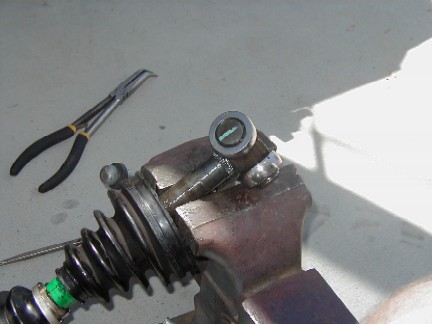
Apply a light coating of grease to the splines, then slip a washer and snap clip onto the outside of the axle spline where it slips through the hub.
The washer is going on in this picture.


7-22-2004