tderose:
Here ya go! Not complete yet but maybe it will help.
Raise and support the front of the vehicle. Remove the front wheels.

Remove the three small nuts at the top of the strut.
******* WARNING *******
DO NOT REMOVE THE LARGER NUT IN THE CENTER OF THE STRUT ASSEMBLY!! Removing the center nut can cause serious injury!


Now onto the fun stuff! You will need to compress the spring just enough to get the top plate off.
Once the spring is compressed, remove the center nut and the top plate. Once the top plate is off, you can slowly and evenly remove the spring compressors. The old strut and spring can be disposed of.
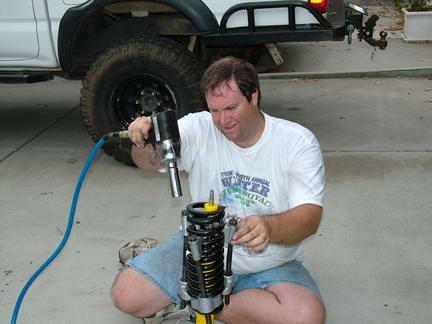
When I compress the springs, I always work down low next to the spring, and never get over the top of it. If a spring compressor lets go (and it has happened a few times to me) it will shoot up quite high in the air. You dont want to be in the way!
You will assemble the new strut and spring, using the old top plate from the factory strut. The OME springs are stiffer than the factory springs, so they are a bit harder to compress.


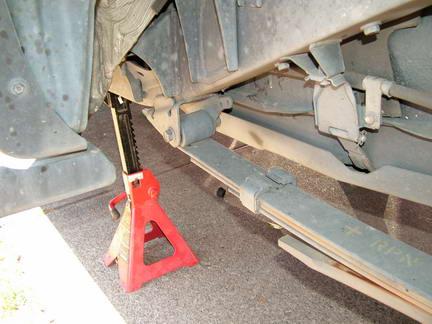
Raise the rear of the vehicle by the rear axle. Place your jack stands under the frame and lower the vehicle onto the stands. You are not going to remove the jack, just lower it until the vehicle is on the jack stands and then stop.
Remove the rear shocks. With the rear shocks off, you can lower the rear axle further until the leaf springs are in a neutral position. As you lower, watch the rear shackle. When it starts moving forward, you are about where you want to be.
The rear spring replacement is a direct swap. You will simply remove the factory springs and install the OME springs.
The bolts at both ends of the springs are removed, the u-bolts are removed and the springs are removed from the truck.
Below are some additional pictures and a few items that may help with the swap.

Picture of the new spring installed. Note that the + on the springs goes towards the front of the vehicle.
The springs are also numbered a and b, a is for the drivers side, b is for the passenger side.

A shot showing the bottom of the u-bolts.
There is a centering pin in the leaf pack, and a hole for the centering pin in the axle spring pad. Once these are together, it wil hold things in place while you install the u-bolts again. Dont forget the bump stop on top of the leaf pack!
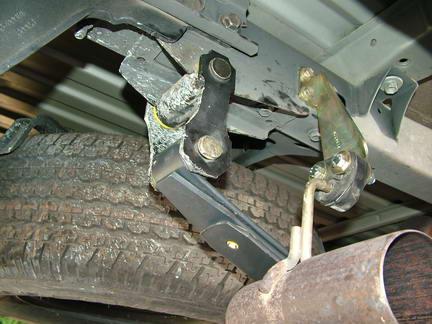
The leaf spring shackle is removed by taking the 2 nuts off, then the opposite plate and both bolts come apart as one piece.
Also shown in this picture is the exhaust lowering bracket. This is a simple bolt on installation that takes about 5 minutes.


You will need at a minimum to adjust the rear brake proportioning valve. This arm that goes from the frame to the rear axle is used to adjust the rear brake pressure. When you place a heavy load in the rear and the rear of the truck sinks, the arm is pushed upward, increasing the amount of rear brake power. When the load is removed, the arm moved down, decreasing the rear brake power. This keeps the brakes from locking up in the light rear of an empty truck, but also provides for more stopping power when you carry a load.
While a new bracket should be used, for now we move the adjusting screws to the top of the threads and secure them there.
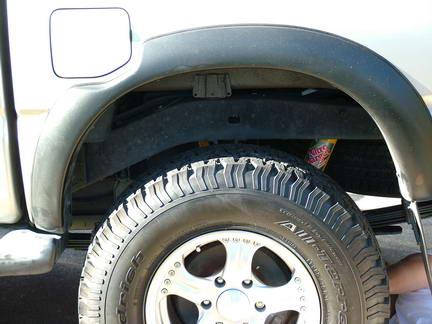
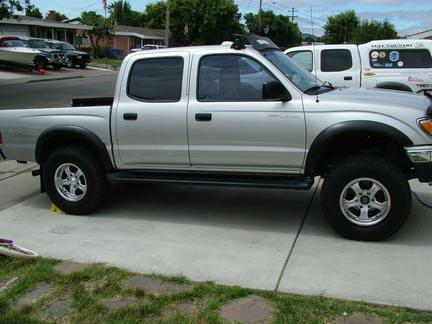
To the left you can see the additional room in the rear wheel well.
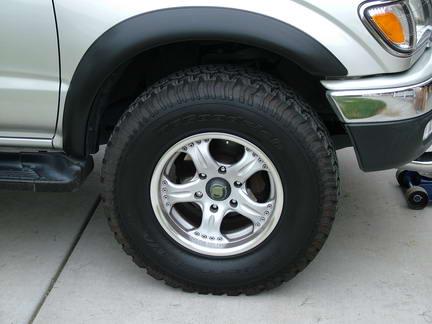
Below is a side by side shot of the front wheel wells showing the increased room.

9-17-06